Claude Code — Anthropic
Claude Code is Anthropic's agentic coding environment with GitHub Actions integration, launched to general availability in August 2025. It operates across three execution contexts: the Claude.com interface, VS Code integration, and GitHub Actions CI/CD environment.
Setup & GitHub Integration
- Install the Claude Code GitHub App — grants private repository access via native GitHub App with OAuth authentication.
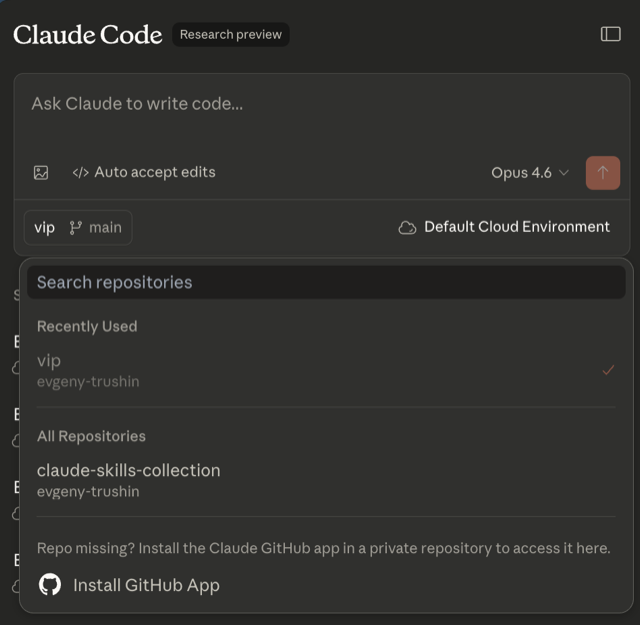
- Select target repository — choose the repository from the dropdown (e.g., "vip").
- Configure model selection — select the desired model (e.g., Opus 4.6) and enable auto-accept edits.
- Configure coding standards — add a
CLAUDE.mdfile in the repository root to define custom coding standards, conventions, and project-specific instructions. - Verify task execution — review completed tasks via the task list view, which shows status indicators and line change counts.
Agentic Capabilities
- Autonomous PR implementation from GitHub issues
- Triage and duplicate elimination across open issues
- CI failure analysis and automatic fix generation
- Code review comment implementation
- Vulnerability scanning and remediation
- Subagent support for parallel task execution
- Terminal command execution within GitHub Actions
- Plan-first approach: generates a visible implementation plan before executing changes
Execution Model
Hybrid asynchronous (via GitHub Actions) and synchronous (via Claude.com).
Tasks are triggered through GitHub issue assignment, PR mentions (@claude),
or direct prompts. Actions run in a standard GitHub container with Anthropic-managed secrets.
Platform Reference
| Attribute | Value |
|---|---|
| Provider | Anthropic |
| Base URL | https://claude.ai/code |
| GitHub Auth | Native GitHub App with OAuth authentication |
| GitHub Operations | Read/write permissions for contents, issues, pull requests; branching, PR creation, commit, review comment responses |
| Underlying LLM | Claude 3 Sonnet / Claude 3.5 Sonnet (model selection available) |
| Execution Model | Hybrid async (GitHub Actions) + synchronous (Claude.com) |
| Pricing | ~$20/mo (Claude Pro); GitHub Actions execution billed separately via Anthropic API key |
| Enterprise | SOC 2 Type II compliance ready; GitHub Enterprise Server support via custom GitHub App; AWS Bedrock and Google Vertex AI deployment options |
| Best For | Teams with deep GitHub workflows, CI/CD pipelines; routine maintenance, CI failure fixes, documented standards-driven work |
ChatGPT Codex — OpenAI
ChatGPT Codex is OpenAI's autonomous coding agent, integrated into the ChatGPT platform. It operates as a primary autonomous agent, using sandboxed cloud environments connected to GitHub repositories.
Environment Setup & GitHub Integration
- Navigate to Environments — open the Environments section in Codex.
- Create a new environment — click the "+" button to start setup.
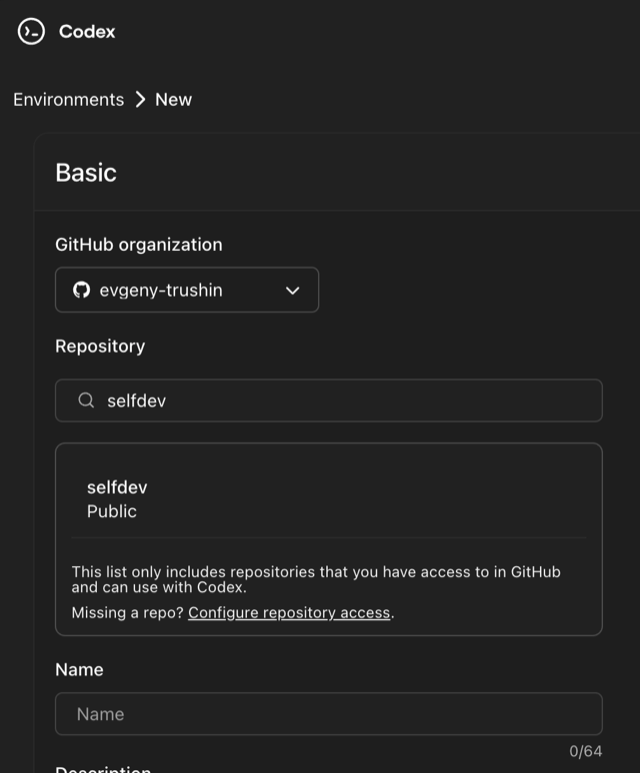
- Select GitHub organization — choose the organization (e.g., "evgeny-trushin").
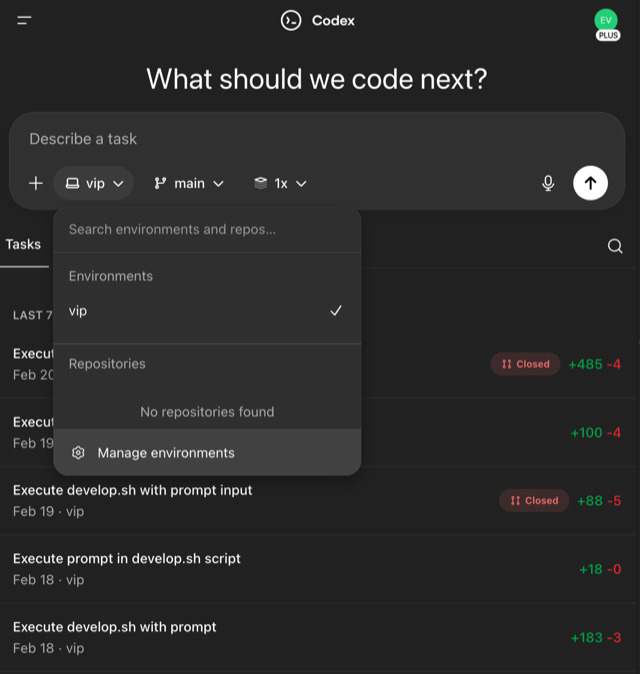
- Search and select repository — only repositories with Codex access are listed.
- Configure repository access — use the "Configure repository access" link to manage permissions.
- Name the environment — provide a name and confirm setup.

Agentic Capabilities
- Autonomous multi-step task execution in sandboxed cloud environment
- Multi-file code generation, editing, and deletion
- Terminal/shell command execution
- Codebase understanding and navigation
- Background/asynchronous task execution
- PR creation with proposed changes
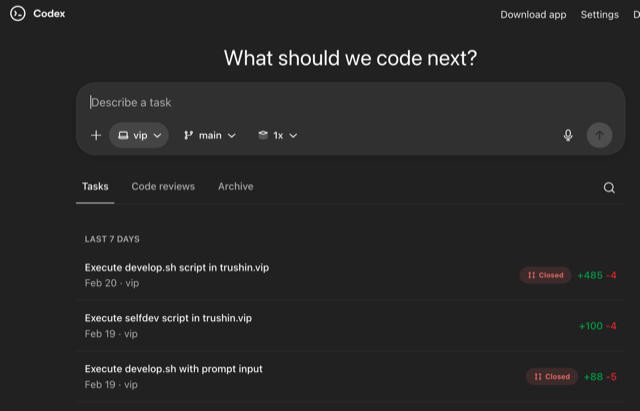
- Task tracking with status indicators and line change counts
Execution Model
Asynchronous background execution. The developer describes a task, Codex works independently in a sandboxed environment, and creates a PR with proposed changes. The developer reviews and merges. Environment-based isolation ensures reproducibility.
Platform Reference
| Attribute | Value |
|---|---|
| Provider | OpenAI |
| Base URL | https://chatgpt.com/codex |
| GitHub Auth | Native GitHub integration (OAuth-based) |
| GitHub Operations | Repository cloning, branch creation, commit, PR creation, environment sandboxing |
| Underlying LLM | OpenAI models (GPT-4o partnership) |
| Execution Model | Asynchronous background execution in sandboxed cloud environment |
| Pricing | Included in ChatGPT Plus ($20/mo) |
| Best For | Autonomous task execution, code generation, issue resolution, PR-driven workflows |
Jules — Google Labs
Jules is Google's flagship autonomous coding agent, launched to general availability in August 2025 after a successful beta phase (40K+ tasks completed, 140K+ code improvements). It operates as an "async development agent" for scoped, well-defined tasks, running in secure Google Cloud VMs.
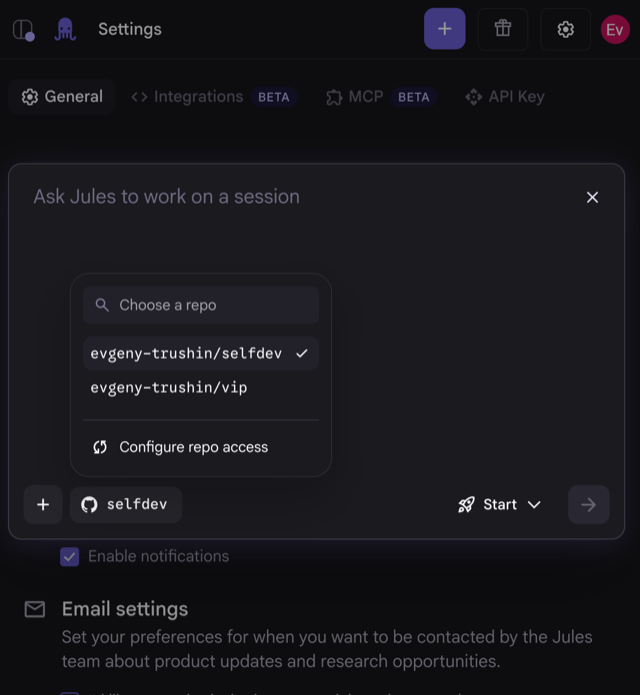
Setup & GitHub Integration
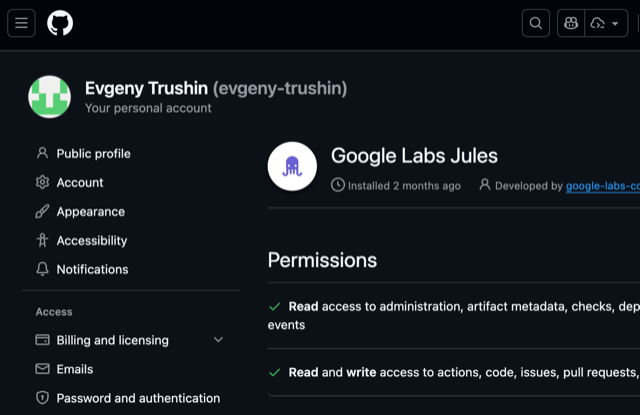
- Install the Google Labs Jules GitHub App — install from GitHub Settings > Applications.
- Grant required permissions — read access to administration and artifact metadata; read and write access to actions, code, issues, and pull requests.
- Select target repository — open Jules and choose the repository from the session modal (e.g., "evgeny-trushin/vip").
- Configure repo access — use the "Configure repo access" link to manage which repositories Jules can access.
- Use Environment Snapshots — save dependency states for reproducible execution.
- Explore Settings tabs — General, Integrations BETA, MCP BETA, and API Key.
- (Optional) Jules CLI — configure Jules Tools for terminal-native workflows.
- (Optional) Public API — use the Jules Public API for third-party integrations.
Agentic Capabilities
- Plan-first workflow: generates a visible execution plan for user approval before modifications
- Autonomous bug fixing from GitHub issues
- Feature implementation from issue descriptions
- Dependency management and version upgrades
- Test execution and validation
- Multimodal input support (text, audio, images for context)
- Audio changelogs for asynchronous status sharing
- Support for empty repositories (can create projects from scratch)
- Reusable environment snapshots for faster execution
Execution Model
Purely asynchronous, backgrounded in a secure Google Cloud VM. The user assigns a task, Jules executes autonomously in an isolated environment, and generates a PR for human review. No interactive participation required. Designed for "scoped tasks" with well-defined acceptance criteria.
Platform Reference
| Attribute | Value |
|---|---|
| Provider | Google Labs |
| Base URL | https://jules.google.com/ |
| GitHub Auth | Native GitHub OAuth integration (deepest among all platforms) |
| GitHub Operations | Full repository access management (all or selected repos); automatic branch/PR creation with CI integration; GitHub Issues integration for task sourcing |
| Underlying LLM | Gemini 2.5 Pro (custom-trained for coding) |
| Execution Model | Purely asynchronous, secure Google Cloud VM |
| Tooling | Jules CLI (Jules Tools, October 2025), Public API (October 2025) |
| Pricing | Free tier for basic usage (commercial pricing anticipated usage-based) |
| GitHub Integration Depth | Ranked #1 deepest integration in market analysis |
| Best For | Teams seeking free/low-cost autonomous agents; routine maintenance, dependency updates, well-specified bug fixes |
| Limitations | Designed for scoped tasks with well-defined acceptance criteria; less suitable for exploratory, vague, or multi-phase projects |
GitHub Copilot Coding Agent — Microsoft / GitHub
GitHub Copilot Coding Agent (internally codenamed Project Padawan) is GitHub's native autonomous coding agent, launched in May 2025. It operates directly within the GitHub.com interface and GitHub Actions environment as a Tier 1 Primary Autonomous Agent — distinct from Copilot Agent Mode (local VS Code).
Setup & GitHub Integration
- Navigate to GitHub Copilot settings — open https://github.com/copilot and ensure a Copilot subscription is active ($10/mo base or $39/mo Pro+).
- Enable the Copilot Coding Agent feature — activate the Coding Agent capability in the Copilot settings panel.
- Assign issues to
@copilot— trigger autonomous task execution by assigning any GitHub issue to@copilot. - Review Actions runner configuration — Copilot executes in an isolated GitHub Actions runner environment automatically — no external VM or approval workflow needed.
- (Optional) Configure MCP servers — set up Model Context Protocol servers for extended tool access (databases, APIs, custom tools).
- Set up iterative feedback loops — configure feedback and task refinement workflows for complex multi-step tasks.
- Verify PR review integration — confirm that Copilot-created pull requests integrate with your existing review workflow.
Agentic Capabilities
Coding Agent (Autonomous)
- Multi-file code generation and editing from issue descriptions
- Terminal command execution within the GitHub Actions environment
- Test suite execution and automatic failure remediation
- Automatic PR creation with test results included
- Feature implementation and bug fixing with verification
- Self-correction: iterates based on test failures and CI feedback
Agent Mode (VS Code — Interactive)
- Real-time interactive coding assistance within VS Code
- Autonomous multi-step task execution with terminal access
- Context-aware code generation using open files and workspace
- Custom instructions for tailored AI suggestions
Code Review Agent
- Automated PR review with inline suggestions
- Security vulnerability detection
- Code quality and best-practice recommendations
MCP & Multi-Model Architecture
GitHub Copilot supports Model Context Protocol (MCP) servers for extended tool access — enabling connections to databases, external APIs, and custom tooling. The platform features a multi-model AI architecture supporting GPT-4o, Claude, and Gemini models, allowing teams to select the best model for each task.
Execution Model
Asynchronous background execution in the GitHub Actions environment. The developer assigns
a GitHub issue to @copilot, Copilot works independently in an isolated runner,
and creates a PR with proposed changes. The developer reviews and merges. Zero setup
friction — works with the existing GitHub.com interface without external VMs or
approval workflows.
Competitive Advantages
- Zero setup friction — works natively within GitHub.com, no external tools or VMs required
- Deepest GitHub integration — built by GitHub, leveraging full platform API access
- Multi-model flexibility — GPT-4o, Claude, and Gemini support for model selection per task
- Unified ecosystem — Coding Agent, Agent Mode, and Code Review Agent under one subscription
- Enterprise-native — inherits GitHub Enterprise security, compliance, and audit infrastructure
Platform Reference
| Attribute | Value |
|---|---|
| Provider | Microsoft / GitHub |
| Base URL | https://github.com/copilot |
| GitHub Auth | Native — built into GitHub.com (no separate GitHub App installation required) |
| GitHub Operations | Full GitHub platform access: issues, branches, commits, PRs, Actions runners, code review |
| Underlying LLM | Multi-model: GPT-4o, Claude, Gemini (model selection available) |
| Execution Model | Asynchronous background execution in isolated GitHub Actions runner |
| Tooling | MCP server integration, Agent Mode (VS Code), Code Review Agent |
| Pricing | Copilot Individual $10/mo; Copilot Pro+ $39/mo (includes Coding Agent) |
| Enterprise | GitHub Enterprise Server support; SOC 2 / ISO 27001 compliance via GitHub; organization-level policy controls; audit logging |
| Best For | Teams already on GitHub seeking zero-friction autonomous coding; organizations wanting multi-model flexibility; enterprises requiring native GitHub security and compliance |
GitHub Configuration
GitHub serves as the central orchestration layer for AI coding agents. All primary autonomous agents require GitHub App installation and repository access grants. This section documents the shared foundation that enables Claude Code, ChatGPT Codex, Jules, and GitHub Copilot.
Configuration Steps
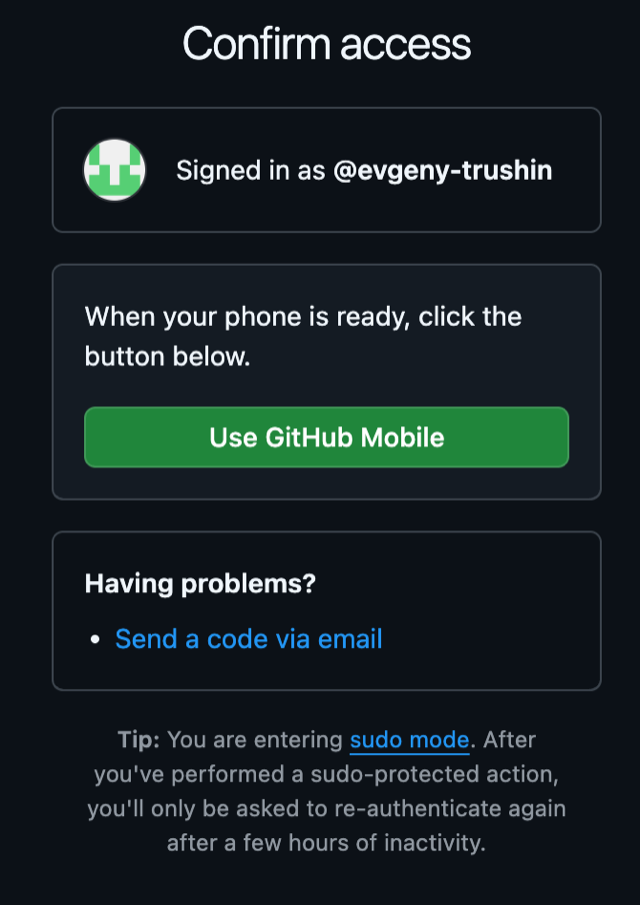
- Authenticate via GitHub — use GitHub Mobile or email fallback to enter sudo mode.
- Navigate to Installed Apps — go to GitHub Settings > Applications > Installed GitHub Apps.
- Review installed apps — Google Labs Jules, Claude Code GitHub App, Codex integration, GitHub Copilot.
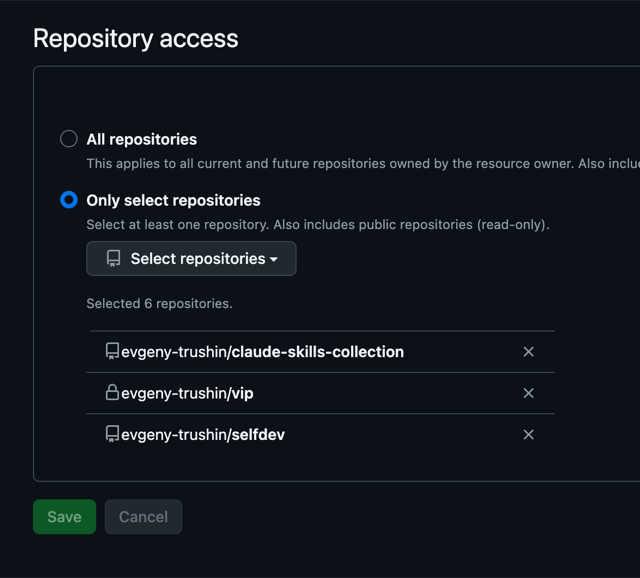
- Configure repository access — for each app, select "Only select repositories" (not "All repositories").
- Choose specific repositories — grant access to targeted repositories (e.g., vip, selfdev, claude-skills-collection).
- Review permissions — verify each app has appropriate read/write access to administration, artifact metadata, actions, code, issues, and pull requests.
- Save the configuration.
Authentication Methods
| Method | Description | Used By |
|---|---|---|
| GitHub App (OAuth) | Official GitHub App distribution, one-click installation via GitHub Marketplace, automatic read/write permissions | Claude Code, Jules, Devin, Sweep AI, CodeRabbit, Bolt.new |
| OAuth | Standard OAuth flow for user authorization | Jules, Replit, Lovable |
| Personal Access Token (PAT) | Token-based authentication, manual setup | Amazon Q (GitHub Enterprise Server), Devin (GitHub Enterprise) |
| Git CLI + MCP | Manual Model Context Protocol server setup for GitHub API access | Cursor, Windsurf |
Security Best Practices
- Use selective repository access over blanket "All repositories" (principle of least privilege)
- Private repositories (e.g., vip marked with lock icon) require explicit grant
- Sudo mode protects sensitive configuration changes (re-authentication after inactivity)
- Review installed app permissions periodically
- Consider SOC 2 Type II compliance requirements for enterprise deployments
- For strict data residency: evaluate self-hosted options (OpenHands, Windsurf Enterprise, Cursor local operation)
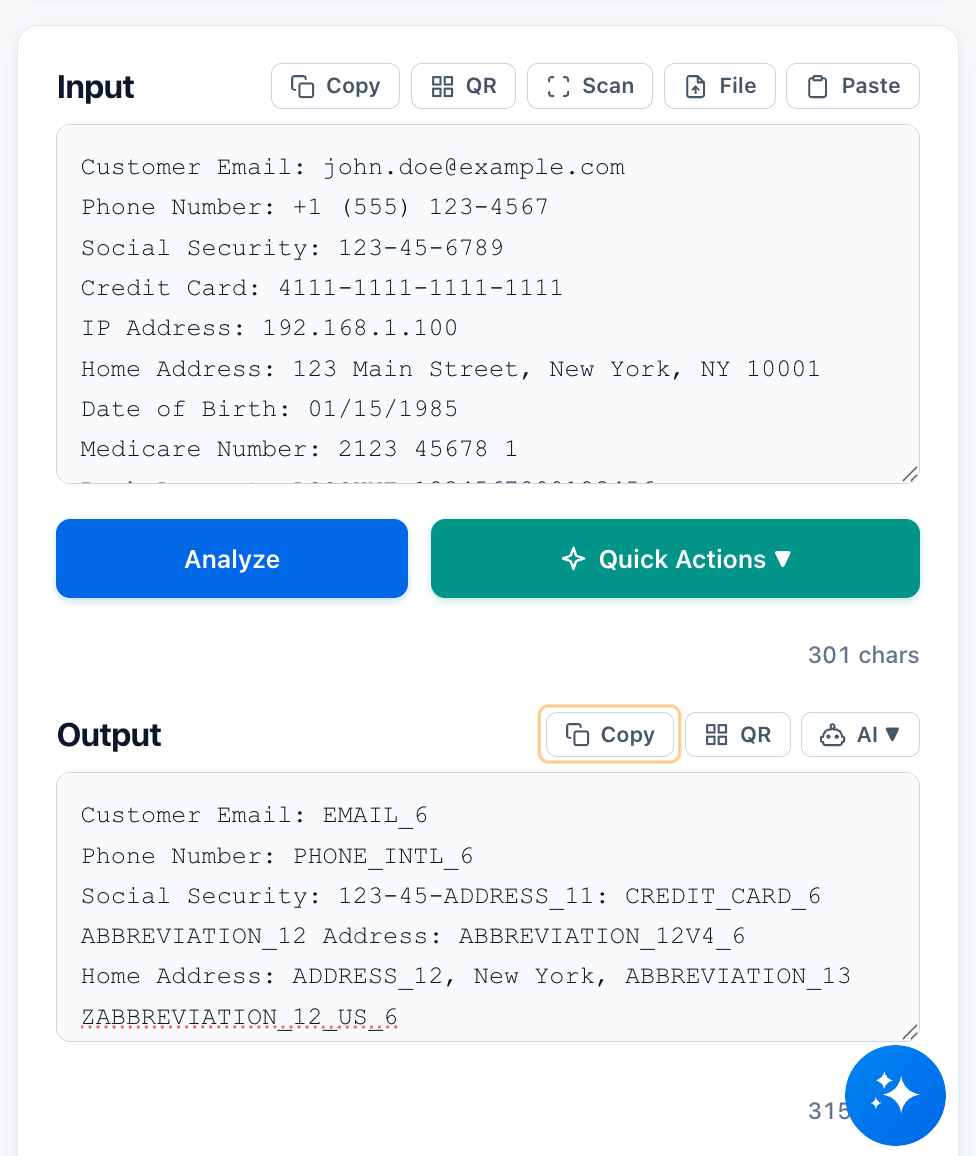
Obfuscate — Browser-Based Data Masking
Obfuscate is a browser-based data sanitisation tool that detects and replaces personally identifiable information (PII) using 40+ pattern types. It runs entirely in the browser with zero server dependency — your data never leaves your device. Mask sensitive data locally, then pass sanitized output to any AI agent.
Privacy & Offline Features
- Save & Go — press Ctrl+S (or Cmd+S) to download the page. Open the file anytime, no internet required.
- Zero Server Dependency — everything runs in your browser. Your data never leaves your device, even the page itself is self-contained.
- Air-gapped Ready — use on secure networks, planes, or anywhere without connectivity.
Why Use Browser-Based Data Masking?
- 100% local processing — data anonymization happens in your browser, no servers, no uploads.
- 10x faster — automated data masking processes 10,000+ lines in seconds.
- Built for AI — data obfuscation techniques designed for LLMs.
- Free forever — no cost data masking software with no limits.
- Offline data transfer — use QR codes to pass data via phone.
- Secure PDF export — rasterize PDFs to flatten text layers.
- Masked & Sanitized modes — choose black-out masking or token replacement.
New in This Release
- File uploads + PDF redaction — drop PDF or text files, sanitize them instantly.
- AI launchers — open sanitized output directly in ChatGPT, Claude, Gemini, and more.
- Reusable mappings — import/export JSON token maps to keep teams in sync.